Memories... Like Mom Made!

Memories... Like Mom Made!
Out of dark moments, flowers grow.

Tuesday, May 21, 2013

Lorelei's Nursery Makeover: DIY Easy Frame Collage Tutorial Using Waxed Paper


About 6-7 years or so ago when I was in college, Pottery Barn had several uber cute pictures in their catalog of a collage of frames above a couch in a very expensive living room that I knew I would never be able to afford. But some very amazing and clever friends of mine recreated something similar in their VERY posh apartment that I have never been able to get out of my head (Jessica and Steven if you read this, yes I still think about your awesomeness!).

For years now I have thought about how cool their frame wall looked and I knew I was going to do it one day... But I never really had the time, place, energy etc... At my house in California I did something sort of like what I wanted to do, but it was on a very small scale and though I had always intended to expand it, it ended up smaller and smaller... See those frames on the right? That was my feeble attempt at a cool wall collage. Thanks to a stick horse that Landon used to strategically knock the frames off the wall, the frames ended up in pieces so eventually the collage was dismantled and the expansion of said collage never happened.

When I was planning Lorelei's room I knew I wanted a statement wall. Three of the walls in her room are white and I knew I wanted to put something spectacular on one of the walls. I also knew I didn't want to put the frames over her crib in case we had a rough storm and it knocked one of the frames loose while she was asleep (crazier things have happened!).

The biggest thing that I knew for certain was that I wanted to do this quickly and efficiently. I didn't want to spend hours measuring and planning and marking on the wall. I just wanted it to be easy and quick.

So after I prepared and painted and got all of the frames ready, it hit me.

I would use wax paper to make the perfect frame collage. Why didn't I think of this sooner? Surely this is genius in its purest form! Or just a happy accident, like most of my ideas...


So I started by playing around with the frames I wanted on my wall by shifting them around on the ground. Originally I started with a much larger number of frames. After playing around, I whittled it down to what you see here. Then I measured about how large my collage was going to be and wrote that measurement down.


Then I rolled out my waxed paper to just a little bit larger than my width (or length, depending on how you think, but I am talking about the horizontal length here) and tore three pieces in that length. If you have a bigger collage (vertically) than mine, you may need more pieces. But you get the general idea.


Once you have your wax paper, lay it out as straight and flat as you can, then tape in place carefully using Scotch or clear tape. I used big bright zebra tape because it was what I had on hand. After I got done with the tutorial I found my clear tape, but I was so glad I was done I didn't want to retake all the pictures just for the sake of the gaudiness sheer awesomeness of my tape. Oh and ignore the big bruise on my knee... and the fact that my knees were in this at all. I was trying to do this quickly so I snapped pictures as quickly as I could in between steps... oops!

Make sure the edges dont overlap or it will affect the straightness of your collage once you go to hang it on the wall. I used the edge of my wall to keep it straight and kept it there for when I laid my frames on top. Feel free to tape it to the carpet or floor to keep it from shifting. When you are ready to transfer to the wall, simply pull gently off the ground and fold the tape to the was paper so it doesn't stick to the wall in the wrong place.


Next lay the frames on top of the waxed paper exactly how you want it to look. I took a picture when I had my frames laid out to measure in the first step so that I could refer to it to get the frames perfect.


Using a black sharpie, carefully trace each of the frames as close to the edges as you can.


Remove all the frames and make sure it looks right to you before moving on.


Next decide how high up on your wall you want the collage to be, then hang the waxed paper collage on the wall. I decided I wanted the top of my collage to be exactly 12" from the ceiling. You can see I wrote that on the paper for my own benefit.

I wanted the whole collage to be almost centered on the wall (I chose to have it a few inches closer to the door than exactly perfect since the wall across from the door had a lot going on. I found this more visually appealing). I measured my wall and found where I wanted it to go, then measured 12" down from the ceiling and marked with a very small dot where the corner of my waxed paper template would need to hang. I repeated on the other side and taped the template in place. Then I measured again after taping to make sure it was perfectly even and didn't shift. Then I secured the bottom in place as well, making sure to smooth out the waxed paper carefully.


Then, starting in the upper left hand corner (because I felt like it), I placed my hangers on the wall. I used a variety of hangers I bought in a pack at Wal-Mart and chose each hanger based on the weight of the frame and the strength of the hanger. My favorite ended up being the little white ones because they were very easy to place and hang and very strong, but needed almost zero force to hang (a tiny tap from a hammer did it, but I could also press it in with my thumb) and left a tiny hole in the wall which was helpful if I needed to adjust it. This is due to the fact that they use gravity to stay put and don't actually need to be placed on a stud (though it wouldn't hurt!).

To  make sure I placed the wall hangers in the right spot I measured the hanger on the back of the frame and then marked it's placement on the template. I could have laid the wax paper over the top of the frames flipped back side up and marked them that way but I was anxious to get the collage up on the wall and this seemed just as easy and a little less complicated than  trying to keep the wax paper from wrinkling and slipping over a bunch of bulky frames.


As you can see in the picture above, I made a dot where the hanger on the frame is, but that isn't necessarily where the wall hanger needs to go: to make sure it lined up, I placed the receiving hook part of the wall hanger directly over the dot.


I hung the frame on top of the waxed paper to make sure I had it in the right spot, then moved on to the next frame. When I was finished, I stepped back and made sure I had them all how I wanted them to be, then gently pulled the waxed paper down, ripping it away from the nails and anchors and hangers. I didn't bother removing the frames because I really didn't have to, but if you are worried, feel free to take them down first.

Be careful when removing the paper if you don't want to remove the frames. Don't go nuts and rip it straight off the wall or you will likely get nailed in the head by a frame. Instead, first remove the tape, then pull straight down by pressing your hand flat against the wall on top of the waxed paper and drag it down. It should come away rather easily.


Now you are done! Dust off your hands and pat yourself on the back while you admire your gorgeously decorated wall!

 Ignore the empty frame... I haven't made up my mind what I want to put there or if I just want to rip away the back to expose the wall like in the other tiny frame.

Another empty frame to ignore, but I do have a project in mind for that one! Just have to do it! You can also catch a glimpse of my curtains I made. I just love how they turned out. And of course the Ombre Rosette Pillow and the Drab to Fab Rocking Chair Re-Do. I have had so much fun redecorating my baby girl's bed room!


Sunday, May 12, 2013

Winner, Winner, Chicken Dinner! Mother's Day Winners Announced!

I have always wanted to say "winner, winner, chicken dinner", so now seemed like my chance.

Hope that is okay.

But, I am about to announce FIVE winners, so I am sure at this point you don't care what I say, right? You just want the drum roll to be over and the winners announced, am I right?

Of course I am.

Well to draw out the suspense, since the Wool Dryer Ball Giveaway received nearly 300 entries, I will draw that one last.

Instead of going chronologically like a normal person might, I will draw the winners in order of entries received, starting with the fewest number of entries.

Since I received such a huge number and since I have FIVE giveaways to moderate, if the winner I draw has not completed all of the mandatory options, I will redraw before announcing. Otherwise I would not be able to draw winners for a few days because combing through every entry and verifying would  take me way too long!

So, happy mother's day, and congratulations to the following winners.

Customized Smart Phone Case from His and Hers Printing: Rachel Marmaud

Item of Choice from In Good Taste Gourmet: Amanda Tengler

NaturOli Soapnuts from Like Mom Made: Amanda Rullman

Mother's Necklace from Decked Out: Custom Creations by Virginia Decker: Kelley Elizabeth Dykes

Wool Dryer Ball Giveaway From 3 Generations of Design: Christina Hallmeyer

Congratulations to everyone! I will be contacting the winners this week, but right now, I am going to go enjoy my Mother's Day! My sweet man is sending me and his mom to go get mani/pedis while he grocery shops and takes care of the kids. <3 p="">
Have a blessed and wonderful Mother's Day!


Thursday, May 2, 2013

Customized Smart Phone Case from His & Hers Printing

A couple of weeks ago my beloved android phone died.

I mean it just up and died. It decided it was not in the mood to work anymore and it was D-O-N-E.

So my boyfriend took me to the phone store, and bought us both matching iPhone 5s.

I promise I am not spoiled at all... I mean... he made me drive so it evens out, right? Oh and then he took me to lunch at Landry's seafood restaurant and it was mouthwatering unbelievably amazingly delicious not that great at all......

Ok, so I am spoiled...

And yes, Landry's was delicious, so Landry's fans, don't get bent out of shape!

Well anyway so we had our matching iPhones and we both needed cases... because simply put: I have two kids and he has bad luck with phones...

Nuff said.

He got an industrial you-can-drive-over-it-in-your-truck-and-nothing-will-happen type case, and I browsed the available girly cases and was utterly disappointed. I mean seriously... The choices were flowers or pink. That was about it.

And they were $50.

I mean come on!

So I decided to wait on the case and look online and see what I could find. As soon as I got home I started browsing Etsy.

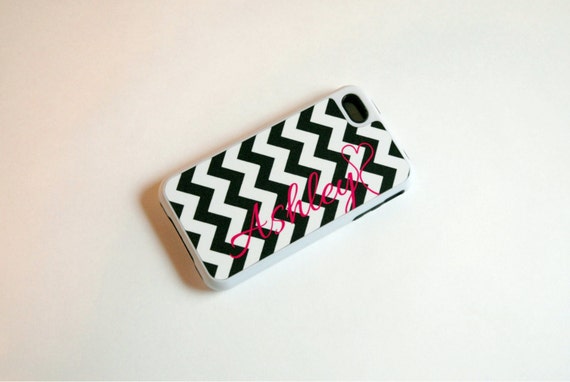
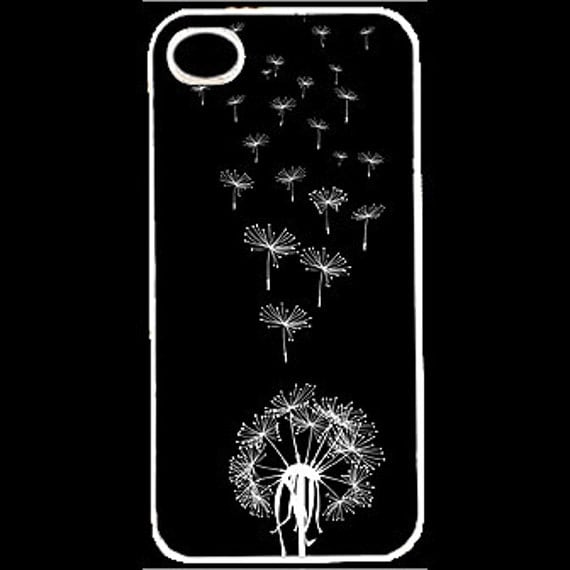
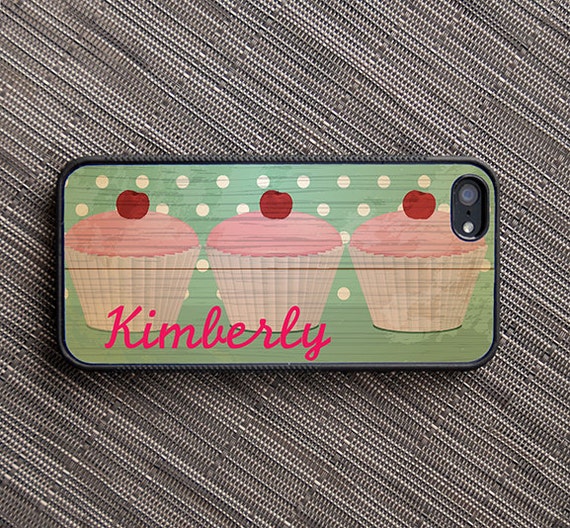
By some stroke of luck I found a case that I absolutely fell in love with from a shop called His & Hers Printing. It was clean and simple and girly and pretty without being something I have seen a million times. Then I found out she could customize my case with my name on it!

BINGO!

I knew I wanted my name going sideways up the phone in a scripty type font. I am not the best with descriptions when I am excited (I become the equivalent of a stuttering toddler when I get really giddy), so I quickly typed out my best attempt at describing what I wanted and within a few minutes she sent me back not only a reply, but a PROOF!


Right away I knew this was a shop I wanted to work with.

She reassured me that I could deny her proofs as many times as I needed to and she would continue working on it until it was perfect.

Can you say 100% customer satisfaction? I can. But to be truthful their satisfaction rating is 98%, which is pretty stinking amazing. And honestly, I have no clue how it isn't 100%... Just saying. ;)

After we tweaked the color of my name over and over by sending messages back and forth, my design was complete. Then all I had to do was wait for it to be finished.

Which is really, really hard.

But while I was waiting, my wheels got turning. This cell phone case is super exciting for me because it isn't very often that I get something just for me that is girly and personalized and mine all mine... Pretty much everything I own gets claimed by one of my pint size bosses or is shared property.

So having something just for me that makes me this excited? It is pretty cool.

And I wanted to share that incredible experience with another mama. 

I mean, surely there are a ton of moms who would love a case like this:


Or this:


And definitely this one:


And I really want to share this shop with other people because their level of customer appreciation is phenomenal, and people who do things right deserve recognition!

So after chatting with Kim of His and Hers Printing, she agreed to award a free customized case to one lucky reader. She can make hard plastic cases to accomodate iPhone 5, iPhone 4/4s, Samsung Galaxy S II, Samsung Galaxy S III, and HTC One X. She also has silicone cases available for iPhone 5 and iPhone 4/4s, which is the option I chose.

To enter, visit His and Hers Printing on Etsy and check out their awesome products. Favorite their shop, browse their items, heck maybe even buy a case... but don't forget to come back here and follow the rafflecopter instructions to enter to win a free customized cell phone case. You get more entries for favoriting their shop, liking their Facebook page and sharing, and liking their twitter account and tweeting about this contest, so make sure you check out all the options! 

The winner must be a follower of Like Mom Made, so don't forget to visit the sidebar at the top that says "Follow Like Mom Made" and make sure you are following!

The contest ends on Mother's Day, like all of my giveaways going on right now, so make sure you complete all of your entries prior to May 11th at 11:59pm. Don't forget to complete your entries to win Wool Dryer balls from 3 Generations of Designs, NaturOli Soapnuts, Customized Sterling Silver Mother's Necklace, and Gourmet Food from In Good Taste.
Seriously though, what mom doesn't need THIS?


Wednesday, May 1, 2013

Giveaway from In Good Taste Gourmet

Today's giveaway is extremely appropriate for our Mother's Day Giveaway Celebration because it is sponsored by In Good Taste Gourmet, which just so happens to be owned by my mommy!

What is even better is that I love her products!


So what is In Good Taste Gourmet? In Good Taste is an online gourmet food site that sells the most scrumptious BBQ sauces, marinades, pasta sauces, salsas, and other stuff foodies would love! My mother owns and operates In Good Taste and in addition to her amazing sauces and gourmet goodies, she also makes gift baskets that she jam packs with incredible gourmet food, coffee, candy, whatever you can think of!

I have to admit that I usually always ask her for help when going to a wedding. I will bring her something like a cast iron skillet or cool pasta or salad bowl that the couple had on their registry, then I will have her create something amazing and useful with it. The last wedding I went to I took them an amazing bamboo pasta bowl with a set of bamboo tools that they had registered for, and then my mom *ahem* In Good Taste filled it with gourmet pasta, a jar of their amazing sauce, and a Wind & Willow cheeseball for the couple to share as an appetizer. It was the perfect gift and the couple loved it.

The best part about In Good Taste is that there is something for everyone. And everything tastes great. Know how I know? My mom (and whole family) taste tests and approves everything included in the brand. If it doesn't pass a rigorous taste test, it doesn't hit the shelves.

And we LOVE food, so you know it is good.


One of my favorite sauces is the Honey Jalapeno Grilling Glaze. I marinated some chicken breasts in it and tossed them in a skillet on the stove and they came out so juicy and flavorful. I also love the Tomato Pine Nut Parmesan Pasta sauce - it is so delicious that I can eat it on plain pasta without needing meat at all, but add some meatballs or diced chicken and you have an easy, out-of-this-world good meal without any fuss at all! And I have used or tried almost every single Wind & Willow product at least once... I used to host a lot of baby showers and parties when I was living on a military base and these products were a quick and easy addition to any hostess' menu!

So for this giveaway, In Good Taste will be awarding one lucky winner with any single item of their choice from their In Good Taste or Wind & Willow lines. Visit In Good Taste and check out their gourmet sauces or Wind & Willow products and tell me which one you would choose if you win.

And make sure you check back tomorrow: there will be another giveaway sponsored by the Rocs branch of my mom's business... You won't want to miss it!

And don't forget to check out the other giveaways going on! You can find a complete list here.


http://www.rafflecopter.com/rafl/display/90cc283/" rel="nofollow">a Rafflecopter giveaway