Memories... Like Mom Made!

Memories... Like Mom Made!
Out of dark moments, flowers grow.

Wednesday, April 17, 2013

Lorelei's Nursery Makeover: Ombre Rosette Pillow Tutorial

This gorgeous pillow is my absolute favorite thing I have made for Lorelei's room so far. And that is a big statement because so far, I have made EVERYTHING in her room.

In case you are wondering, no, I don't get any sleep! ;)

The inspiration for this pillow came from the ever popular ombre effect. It has been "in style" for a few years now, but I really haven't incorporated it into my life yet. This was my opportunity. When I started redoing Lorelei's room, I knew I didn't want to get locked into just one pink or just one pattern or texture. I wanted to have a large range of shades of pink, as well as various black and white patterns and textures. I figured this way, I didn't have to pass up on things I loved because they wouldn't match her room. It also gave me more freedom to be creative and allows her room to change as her tastes change.

Three of her walls are white, and one is pink. Most of her decor is black and white, with just a few touches of pink and silver. I made over an old rocking chair in black and white with pink tacks. I just needed a bigger splash of pink in her room. Nothing too over the top, but something that would draw the eye and be a "WOW!" piece. I also needed a pillow. Her rocking chair is very low to the ground and has arms on it, and though the arms help me get up (because I am very tall and getting up out of a rocker that is as low as this one is not an easy thing!), Lorelei does bonk her head on them pretty often, so I knew I was going to need a pillow.

 
The other inspiration for this pillow came from one of the girliest frills known to man: the rosette. A couple years ago I posted a bracelet tutorial using a rosette. I have put rosettes on bibs, dresses, headbands, bracelets, picture frames, clips... You name it. I probably hot glued a rosette to it. So I combined my love of rosettes with my love of the color pink and the neccessity for a pillow/splash of pink in Lorelei's room and this is what I got.

It was pretty time consuming and used a lot of hot glue. I am making a second pillow using another idea I have about how to make this even better and then I will post those adjustments if my plans work.


Until then, here is exactly how I created my Ombre Rosette Pillow.


I started with four shades of pink fabric and one white. I had four of the five fabrics on hand and after placing them in order from lightest to darkest I decided I needed one more very pale pink fabric to help transition the white to pink. I used a satiny fabric. You could use cotton, linen, etc. This pillow would look good with any fabric you choose.

One of my pink fabrics is actually even lining fabric, which is like $1 a yd at most craft stores. I was nervouse that the lining fabric might melt or not look as good but it blends right in and I actually prefer the way it feels over the other four fabrics. If you used all lining fabric, you could make this whole pillow for under $2 before your pillow form.

For one 16" pillow you will need:
1/4 yd of each of your three center fabrics (starting at the middle of the rosette and working out)
1/3 yd of your next fabric working out
1/2 yd of your last fabric, which you will also use for the pillow backing
16" pillow form
lots of hot glue sticks
hot glue gun
pins


First cut out a 17.5" square from your darkest fabric. If you are using a different size pillow form you will have to make adjustments accordingly. I started with a 16" pillow form so I added 1.5". I planned on using a 1/2" seam allowance so the rest of my allowance was for shrinkage from the hot glue. Turns out my guess was pretty good because it shrank about quarter of an inch all around.

 
Cut your fabric into 3" strips. You will need only one 3" strip for the very center fabric, but you can eyeball the rest as your are gluing. I cut mine selvedge to selvedge, which left me with 60" strips since my fabric was 60" selvedge to selvedge.

See your lovely pile of fabric strips? Separate them by color, to make it easier on yourself, and arrange them in order with the lightest fabric closest to you.

Lay out your square base fabric and get your hot glue gun ready.

Starting with the lightest fabric, or the fabric you want in the center of your rosette, fold the raw edges in toward the center of your strip and then fold again so that your raw edges are tucked neatly away. Put a tiny dot of hot glue here to keep it shut as you start your rosette. As we glue and work out we will keep folding the raw edges in. If you want a frayed look, you can avoid tucking the raw edges in. Satin frays horribly so I didn't want to go for that look. It would have been a mess.
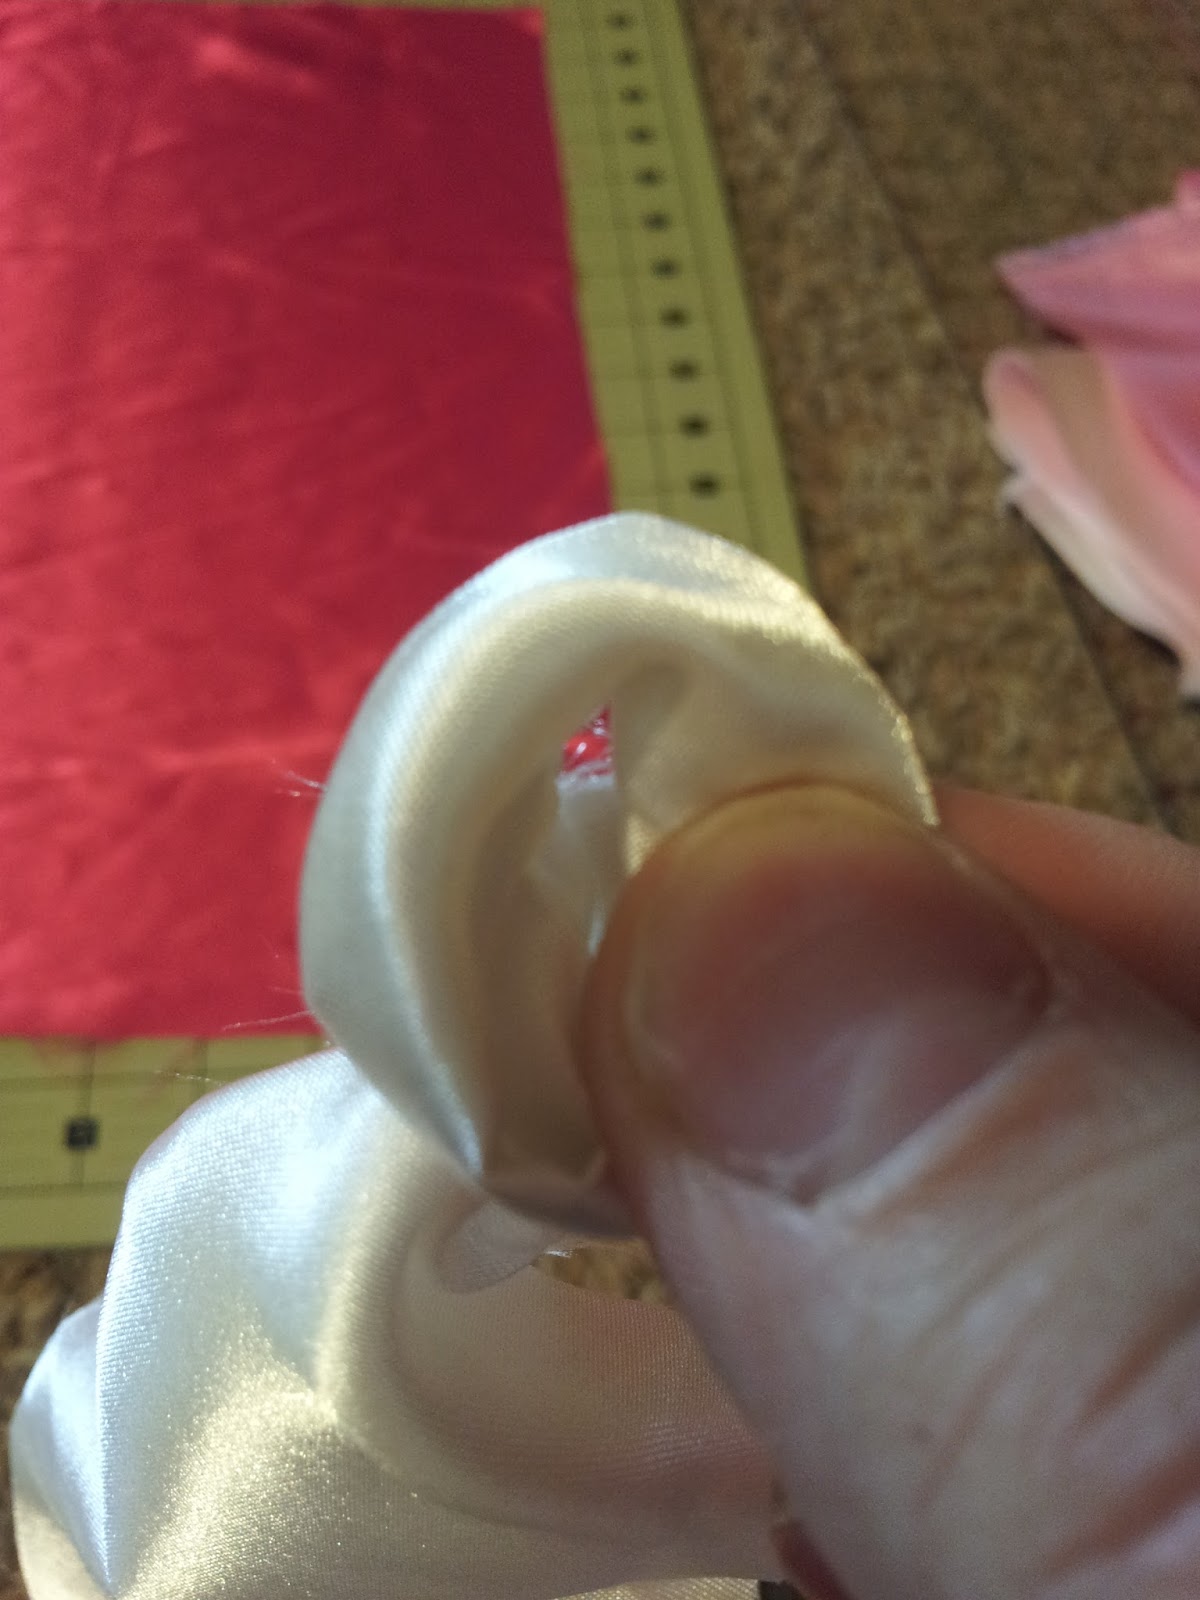
 
With the raw edges tucked and glued, loop the fabric around like you are going to make a knot.
 
 Dont pull the center through but instead leave the end of the fabric at the back of the rosette.


Put a big dob of glue wherever you want to start your rosette on your pillow and glue your little starter rosette down. Be careful not to glue the rest of the fabric strip.

 
After it is set and not sliding around, start twisting your strip and winding around the rosette you have created. I twisted out ward because I liked the way it looked best.

It is easiest to twist the fabric how you want it about 6-8" out, lay it against the already glued down portion of your rosette to make sure it looks good, then lift it up (pinching the end so it doesn't untwist), squirt a thin bead of hot glue along the path it is going to go, then flatten it on top.

Keep your rosette rows as close together as your can so your base fabric doesn't show through. If you accidentally leave gaps, you should be able to put a small dot of hot glue there and smoosh your rosette fabric on top of it.


When you get to the end of your first color, glue the ends down and then move on to your next lightest color. I folded the raw edges of my second color in and glued the end down right on top of the tail of my first fabric. This was effective for hiding the raw edges and kept the transition smooth without allowing any of my base fabric to show through. Use this technique for each color transition.

 
This is a picture of how I kept my edges tucked. I would fold them in like this, then fold the strip in half and twist.

 
When you get through a strip and want to continue one with the same color, just meet the edges and press close together and continue gluing, like I did above.
 
Keep working your way out. I chose to transition colors after each color was a couple inches thick. The picture above is at the end of my second color, right before I transitioned to my third color.

 
When you get to the edges of the fabric and can no longer go in circles, glue all the way to the edge, then fold it back in the other direction (the direction you came from) and continue twisting and gluing. Make sure you keep going in a circle and stay as close to the rosette as your can.

 
When you are finished, trim any straggly pieces hanging over the edge of your base fabric.
 
When you are all finished with the front of your pillow, it is time to make the back. We are going to make an envelope style pillowcase which will be a quick and easy way to take it off for washing.

 
Cut one rectangle that is the same length as the front of your pillow is now (it may have shrank), and 6" wide. Cut the second rectangle to be exactly the same size as your pillow front.


Pin and press both rectangles with a one inch hem on one long edge.

 
A trick I have for getting perfect 1" hems is to use my clear ruler and cutting board as a guide. I slide my ruler 2 inches down from the top edge, then fold the top edge down and pin with my pins several inches apart. Then I slide my iron inbetween the pins and once they are mostly ironed down I remove the pins and continue ironing. Then fold that edge in again and press. You will have a perfect hem.

Sew a 3/4" allowance down each hem. Press.

 
Lay your pillow front face up and arrange your pillow backs on top of it. It doesn't matter which one is in front, you can decide which one you want to be in front on the outside of the finished pillow. Lay that one face down first, then lay the other one down on top of it. Line the over lapping edges up straight and pin them to the pillow front. It looks like my top square is crooked - it is. I was more concerned that the bottom piece (which will be the outer piece when sewn and flipped) is straight. I just wanted the bigger piece to match up on the bottom edge and corners and didn't care as much about it being straight at the top where it wouldn't be seen.

Pin the rest of the edges down, taking special care that the corners match up perfectly.

Sew 1/2" all around. Making sure to backstitch at the beginning and end.

Flip inside out and Voila! Gorgeous Ombre Rosette Pillowcase!

 
Stuff your pillow form inside and admire your handiwork.

 
I absolutely do not mind if you share this idea on your blog, just give me credit! After I created this beautiful work of art I searched to see if tutorials for one like this already existed and they don't, so sharing this idea forward is fantastic, just please make sure credit gets back to the original site - here!


Saturday, April 13, 2013

Lorelei's Nursery Makeover: Wall Art - Simple Step to Making a Photo Mat to Match any Decor

Over the next couple of weeks I am going to be posting tutorials that make up Lorelei's very first room of her own. This is such a big deal that, even though it is a very tiny room, I am packing it full of all of my best and girliest ideas. I am not ready to unveil the whole room yet, but I will give you sneak previews of different projects that I am featuring in her room. Feel free to draw inspiration for your own baby girl's nursery, or adapt a project to fit any room in your house.


This project for example, is a doozy. I mean seriously... It took me all of about.... an hour.... to complete.

And it looks just amazing!

But the best part is: it cost under $5 to make.

I am making a picture frame wall collage on one of the large blank walls in Lorelei's room. I decided I wanted most of the frames blank, a few will be bow holders, and I wanted a few pops of interest to stand out and catch your eye.

That is where this project comes in.

Do you notice that the photo mat here is not the standard ugly white that comes in every cheapo walmart frame?

Nope.

It is HOT PINK. And no, I didn't spend hours (minutes? days? years? I am awful with an exacto knife) cutting a precise and perfect photo mat from card stock, and I certainly didn't spend the $5 plus shipping to special order a costly colored one off of an online craft store (which, I might add, doesn't even carry pink!).

I used a few shots of spray paint I already had on hand.

Voila! Perfectly colored photo mat ready for my adorable prints of scrapbooking paper.

I cut them to size, popped them behind the mat, slid the mat into my $3 Wal-mart frame I spray painted black and then I marveled at my work.

I left the glass out because this is for a baby's nursery. I want her room to be completely child friendly and should one of the frames fall off the wall, I didn't want to risk broken glass. Plus glass is annoying to clean, and as long as I dust at least once every now and again, I won't have to worry about cleaning glass and leaving streaks and getting frustrated.

So there you have it. Now you have my super simple secret to making your own colored photo mat in under five minutes.

But in case you need further instructions, here is a picture tutorial.

First, I started with a cheap, $3 Wal-Mart picture frame. Any cheap frame will do. This is actually NOT the one I used, but I forgot to take a picture before I painted it, but I remembered to take a picture of this identical, but different sized frame before I painted it... So this is the picture you get. The difference here, however, is that not only is this frame 5x7, but it doesn't come with a photo mat, which is the most important part of the project. The photo mat in the frame I purchased had four photo slots. It was 8"x14" which made it perfect for the spot I was going to use it. It was a generic gold two tone color that just wasn't going to work in Lorelei's room, so I spray painted the frame black.

To do the painting, I simply removed the glass and photo mat, left the paper picture in there to protect the back of the frame (which was attached on one side, making it impossible to remove for spraying. I used Krylon Black spray paint and took it outside where I sprayed the whole thing with even sweeping strokes. I let it dry and moved on to the next step.


I took the photo mat and sprayed it with Krylon Mambo Pink spray paint. I was very careful as to not over saturate the mat. It is a paper product, so if it got too wet with paint it would warp and fall apart and I didn't want that. I let it dry after I was done painting it, but I was careful to not leave it on a surface where it would get wet, get stuck to anything that would damage it (like cardboard or paper), or have any unidentified flying objects float into the paint). Waiting for the mat to dry is really what took the longest out of the whole project. 

While the mat was drying, I cut out pieces of patterned scrapbooking paper at dimensions just a little larger than the photo holes in the frame. I based my rectangles off of the dimensions named on the frame (2.5x3) and added about 1/4-1/2" on each side. Make sure you pay extra close attention to the long edges, as those will be over lapping. The short edges don't matter as much. I was also careful to line my papers up straight before cutting and to make sure they were oriented in the correct direction. I don't actually have a picture of this cutting step because, quite frankly, I figured you could handle this part. Since your frame will likely be a different size/shape from mine anyway, just follow the dimension listed for your photo mat and add a little bit extra all the way around. I do suggest using a cutting mat and ruler to get perfectly straight and square edged rectangles.

After my photo mat was dry and my rectangles were cut out, I flipped the photo mat over and laid it out on top of a plastic bag. Using Elmer's Craft Bond repositionable adhesive spray (which I have used in at least a half dozen projects lately!) I sprayed the back of the mat all over. I paid special attention to the thin parts separating the middle photos, but I covered the entire thing pretty efficiently.


Then I arranged my rectangles in a way that I thought would look good in the frame (which is actually not at all what is pictured below... I got brave at the last minute!) and carefully laid each one upside down over the photo openings. If you cut your paper straight to begin with, getting the rectangle perfectly straight will be a cinch. If you eyeballed it and cut it without a ruler, you may have to spend a little more time getting each rectangle super straight.

Gently press and smooth each one of your rectangles on to your photo mat. The adhesive will help you hold them in place so you can turn it over (being sure not to lay it down on your carpet or work surface) and make sure you like how it looks. Once you are sure it looks how you want it to look, use some clear tape in a couple spots to make sure nothing moves.

 Open up your frame and, being careful not to spray the front of the frame, give the inside of the frame backing a good spray. This will help hold the photo mat in, further stabilize the scrapbook paper, and keep everything straight and perfect.


Take your finished photo mat, slide it into your frame, press it firmly onto the frame backing, and then close the frame. If you want to include your glass, make sure it is nice and clean and put it in your frame after pressing the photo mat onto the sticky back ground. Close the frame up, put on a wall or a shelf, and admire.

This project really is so simple and can be done with anything. Wedding photos, baby announcements, pieces of a love letter. Anything! And now, thanks to something you probably already have on hand (spray paint), you aren't locked in to boring white or neutral photo mat colors. So spray away, and enjoy your beautiful art work!


Wednesday, April 10, 2013

Crock Pot Creamy Chicken Tortilla Soup and Baked Tortilla Strips

So I made a regular old Crock Pot Chicken Tortilla Soup a couple of weeks ago, and it was good, but it doesn't hold a candle to this version. I first made this Creamy Chicken Tortilla Soup last summer when I was taking care of my family after their car accident and I wanted something that was quick and easy and I could put in the crock pot and not have to worry about while I was chasing toddlers and helping my grandparents... It was a huge success! Everyone loved it and even though I made a big pot full, it was all gone with zero leftovers, which never happens!

I have since made it probably 7 or 8 times and I have made it with a bunch of different variations... No matter what I have done to it, it has been delicious each and every time. I usually serve this up with a side of store bought tortilla chips if I am in a hurry. I am not, I make homemade tortilla chips or baked tortilla strips. Yesterday I made my own version of cool ranch doritos to eat with my leftovers and it was amazing together. The flavors really melded.


Crock Pot Creamy Chicken Tortilla Soup

2 chicken breast
1 can black beans - rinsed and drained
2 cups frozen corn or 1 can corn rinsed and drained
1 can tomatoes with green chiles (Rotel works great too, but is usually in a smaller can), don't drain
1/2 packet Ranch dressing mix (or a few tablespoons homemade ranch dressing mix)
1 8oz block cream cheese
1-2 tsp cumin
1 tsp cayenne pepper
Salt
Pepper
1/2 cup plain Greek yogurt


Add all of the ingredients except the yogurt to your crock pot. Give a quick stir, but the block of cream cheese will make it difficult to stir too much - don't worry about that. Turn it on low, cover, and forget about it until about 30 minutes before you want to eat.

Shred the chicken (which shouldn't be hard because it will be super juicy. I just stuck my spoon in there and barely stirred it around and it fell apart into perfect shreds!) and add the Greek yogurt. Give it a good stir and let it continue cooking for 30 minutes or until you are ready to eat.

Meanwhile, prepare some Cool Ranch Tortilla Chips or these homemade baked tortilla strips to serve on top. I also like to serve with sour cream, shredded cheese, diced tomatoes, and sliced avocado when I have the time and ingredients, but it is so good, it doesn't need the fixings to taste amazing.


Baked Tortilla Strips

5 small white corn tortillas
Olive oil
salt and pepper

Preheat your oven to 425 degrees. Line a cookie sheet with parchment paper.

Cut your tortillas in to 1 inch strips. I stacked my tortillas up, then cut the sides off to square them up a bit. I sliced once down the middle (so the rounded edges were on the top and bottom, uncut), then in one inch increments perpendicular to my middle cut. My result was a nice pile of little tortilla strips.


I arranged them on the baking sheet, sprayed with olive oil cooking spray (you can just brush the olive oil on if you don't want to cheat like me), and sprinkled with salt and pepper.


Bake for about 5-6 minutes on each side, then serve with soup, dip, salsa, whatever you can dream up!


Homemade Cool Ranch Tortilla Chips and Homemade Ranch Mix Recipe

So I don't like to admit this, but occasionally, I eat Doritos.

I KNOW. I know. They aren't exactly healthy... I mean... they are chips...

But they are SO good. And they taste really great with my Crockpot Creamy Chicken Tortilla Soup, which I just so happened to be having for lunch yesterday. I didn't have any of the bagged stuff, so I decided I needed to make my own in a hurry.

Honestly the recipe I am about to give you ISN'T exactly healthy either... (though you can bake them instead of fry them like I did... I was in a hurry and wanted them that exact moment so frying was quicker... and tastier)... but you can control everything that goes in them, and you can pronounce everything that goes in them, which is a total win. There are some other cool ranch dorito copy cat recipes out there that are closer to the actual dorito, but they use processed cheese powder and I wanted something that was made from seasonings in my cabinet and stuff I actually know... I have no idea what is actually in that powdery cheese stuff.... so I didn't even think about it being a component of ranch doritos until after I made mine and looked some recipes up. I am sure they taste great, but for what I was going for, I think I hit the nail on the head.

You can do this the easy way and use a packet of ranch dressing mix from the store, or if you really want to make it from scratch (and cut out even more preservatives and stuff we can't pronounce) you can mix up a small jar of homemade ranch mix. The rest is stuff you probably have on hand and can mix up in a jiffy. You can even mix the seasoning in a large batch to have ready any time you want some cool ranch chips.

Homemade Ranch Mix

1/4 c. milk powder/powdered buttermilk (like what you use in biscuit mix)
2 tablespoons dried parsley flakes
2 teaspoons dill weed
2 teaspoons garlic powder (not garlic salt)
2 teaspoons onion powder
1 teaspoon dried chives
1 teaspoon salt
1/2 tsp. black pepper

Pulse all the ingredients in your magic bullet (just once or twice should do it), or a blender or food processor. Just pulse until blended. Transfer to a glass jar or clean empty seasoning bottle and use in place of the commercial ranch dressing mix in your regular recipes.

Or use in the recipe below. :)

Homemade Cool Ranch Tortilla Chips

4 large burrito size white flour tortillas (or any type of tortilla you prefer)
oil for frying
3 tablespoons homemade ranch mix (or a packet of the store bought stuff)
1 teaspoon garlic powder
1 teaspoon cayenne pepper
1 teaspoon cumin
a little salt and pepper to taste


Cut the tortillas into wedges. I stack mine up on my cutting board and use my pizza cutter to cut 8 equal wedges.

Heat the oil in a deep frying pan, or if you have a deep fryer, heat that up. If you are using a frying pan, make the oil about 1" thick. We use a large covered cast iron cooker that we keep oil in all the time. When we are done frying, we just put the lid on it and put it on the back of the stove. That way we can have delicious greasy fried food any time we want.... (Hey! We can't ALWAYS be healthy!).

While the oil is getting hot, add the remaining ingredients to a small bowl.


Mix really well

Add the tortilla wedges to the hot oil and fry for about 1-2 minutes on each side, or until golden brown. You really have to watch them because they go from beige to brown in seconds. See the picture on the left they are still a little light, then in the picture on the right they are almost perfect. Don't forget to flip them!

Remove from the oil to drain on paper towels.


While chips are still hot and oily, sprinkle seasoning mix evenly over them. You can add to a bowl and lightly toss, or just sprinkle over the top like I did. I had a little mix left over after my chips because I only fried up 2 tortillas, but you can make as many or as few as you want, and you can make them as seasoned as you desire.

I hope you enjoy your homemade cool ranch tortilla chips! I had mine with my lunch - leftover Crockpot Creamy Chicken Tortilla Soup!


Sunday, April 7, 2013

Broccoli Cheese Breakfast Cups

One of my all time favorite comfort foods is broccoli cheese soup from Panera... Oh. my. deliciousness... I actually made a giant batch of broccoli cheese soup a few weeks ago and it was a huge hit. I should have made a batch of bread bowls to go with it, but I was pressed for time and didn't get it done, but I definitely will post my soup recipe soon.

So you are probably wondering what Broccoli Cheese Soup has to do with breakfast... Quite simply, it was my inspiration for this tasty all in one breakfast treat. I have been making "egg cup" breakfasts for a while now: simple, quick, delicious, and a great way to sneak bits of leftover veggies or meat into breakfast. Vegetables don't normally fit in on the breakfast table, so this is a great way to squeeze another serving in to your family's diet.


These tasty little breakfast cups also have sausage in them, but the sausage could easily be substituted with ham, bacon, even some chopped up sirloin from the night before. Like I said: a great way to use up leftovers!

I have also made a meatless version of these and they were wonderful. And to accommodate my very picky grandmother, I have even made a cheeseless version and those were just as tasty! In fact, she said that it is the best thing I have EVER made for her (I took care of her and my grandfather for 8 months and did a large majority of the cooking, so that is saying something kind of huge!).

Well I hope you like these as much as my family does. I made them this morning and Landon ate FOUR of them by himself. For comparison... I only had two. Ha! And the first time I cooked my boyfriend breakfast, this is what I served... It was a huge success!

Broccoli Cheese Breakfast Cups

1/2 lb mild or spicy breakfast sausage (I used mild this morning. I have also cooked links and chopped them up in the past)
2 large heads broccoli (you will only be using the florets so if your grocer sells just the heads like mine does, buy those so you aren't paying for the stalks)
8 oz cheddar cheese cut into 1/2 inch chunks
8 eggs
milk
salt and pepper
olive oil

Preheat oven to 375 degrees and grease 12 muffin cups. They stick pretty badly no matter how well you grease the cups, so liners are preferable... but I didn't have any on hand.

Cook the breakfast sausage until cooked through, and then chop into bite sized pieces. Distribute among the 12 muffin cups.


Chop the broccoli while the sausage is cooking. Cut into tiny florets, discarding pretty much the entire stalk. You can save it for other recipes that use the whole stalk, like soups and casseroles, but for this, we just want the florets.

Cook the broccoli florets in the grease from the sausage, adding a little bit of olive oil to the pan, and adding more as needed. The florets soak the grease up pretty quickly, so be sure not to let the pan get too dry. You could also add some diced onion or garlic here, but I kept it quick and simple and skipped those ingredients this time.

While the broccoli is sauteing, crack 8 eggs into a large measuring cup. Whisk with a fork until well blended. Salt and pepper the mixture, then add enough milk to equal 2 1/2 cups. Since most large eggs equal about 1/4 cup, you will be adding close to 1/2 cup milk, but just in case your eggs don't equal exactly 2 cups, use the milk to make up the difference. Whisk until well incorporated.

Divide the cooked broccoli and chopped cheese evenly among the 12 cups.


Carefully pour the egg mixture into each muffin cup. It should reach just below the top of each cup.


Bake at 375 for 18 minutes or until the egg whites are just set.


Run a butter knife around each egg cup right after pulling out of the oven. This will make them easier to remove from the pan. Let sit for a couple minutes before serving, then serve warm.


Enjoy!


Friday, April 5, 2013

A Whole New Life... and a Big Fat Excuse...

Hi there...

Remember me?

Yeah...

I know.

I did it again.

I dropped off the face of the earth for an extended period of time...

And well, let's face it, with me, that usually means something HUGE happened.

Because that is just how my life goes.


So maybe you have already noticed a change or two... If you did, well then you deserve a cookie because tonight is the first time I sat down in front of my blog since the very last post I wrote.

You see, if you remember correctly, on June 9, 2012, my parents and grandparents were involved in a horrific car accident that changed their lives, and mine, forever. It has been almost 10 months and they are still not all healed and back to their original selves, and probably never will be.

Well, as if that wasn't enough to take me away from the blogging world for a while, four days after that horrific day, my husband of 4.5 years called me to ask me for a divorce.

Yes.

I finally said it.

I finally wrote the ugly word that I have been avoiding writing to all of you people who don't even see me in my day to day life, because honestly, I didn't know how to say it. I didn't know how to come to a place that I had created for myself and others in the name of Navy wives and housewives everywhere and say that my husband left me.

I couldn't face it.

But I can now. For a lot of reasons.

I mean let's face it... it has almost been a year. I am officially divorced, living in a new state, living a beautiful new life surrounded by people who love me and bring out the absolute best in me as a mother, friend, and person, and I am not ashamed of that.

What more could a person want?

I am not ashamed of being divorced. I think it took a lot of soul searching, contemplating, and meditating to arrive to this conclusion, but I realize now that I can't hide pieces of my life because I am afraid of what others might think. I hid from one of the few things in my world that made perfect sense to me: writing and sharing my passions with people who genuinely want to read what I have to say. I mean, honestly, if you are still reading this, that is pretty amazing (because I am seriously rambling) and I hid from this perfect thing in my life simply because I was terrified to admit to perfect strangers that I am one of the many thousands of women who has been left by a man.

But there is so much more to it than that! I didn't break or fall apart... I didn't give up and run crying into the night! I put one foot in front of the other, like I have through every tough thing I have faced, and I made it. I signed a piece of paper that I SWORE I would never sign (because until I found myself in the position, I truly did not believe in divorce) and I put the pieces of myself back together, taped my heart up, dusted it off, and kept living.

And guess what?

Life got BETTER.

Better than it had been in years.

Which was kind of a wake up call.

And it made me realize, how many women are out there feeling abandoned, lost, scared, cheated, scarred, or unloved because they were left by someone they had given everything for? How many women could read my words and feel like they weren't alone. Feel hope. Realize that it does get better...

After all, that is what this so called cooking blog turned in to anyway, right? A way for me to try and connect with those dealing with unspeakable, difficult, tragic life experiences.

So why would I run from that?

Well I am done running.

So that was my excuse. That is why I was absent for so long.

And once again, I apologize. I have promised before to be a "better blogger"... but I am not going to promise that anymore.

I don't promise I will post every day or once a week or anything like that. And I also don't promise that I won't post five times in one day just because I feel like it.

I will promise that I won't run from you guys any more. I promise that I will try and share some of the bits of awesome from my "new" life (including: sustainable living, home gardening, a complete little girl's room makeover, tons of handmade children's clothes, home based learning opportunities for toddlers, cloth diapering, baby wearing, baby led weaning, and a lot of good cooking) with you when I can. I promise that I will be focusing some personal and public time on spreading awareness about Leila's Resolution and premature birth awareness and prevention. That is a personal promise to myself that I will share with you in the future.... I promise. ;)

So I hope that sums it all up. :)

What topics are you looking forward to from the NEW Virginia?