Memories... Like Mom Made!

Memories... Like Mom Made!
Out of dark moments, flowers grow.
Showing posts with label rosette. Show all posts

Wednesday, April 17, 2013

Lorelei's Nursery Makeover: Ombre Rosette Pillow Tutorial

This gorgeous pillow is my absolute favorite thing I have made for Lorelei's room so far. And that is a big statement because so far, I have made EVERYTHING in her room.

In case you are wondering, no, I don't get any sleep! ;)

The inspiration for this pillow came from the ever popular ombre effect. It has been "in style" for a few years now, but I really haven't incorporated it into my life yet. This was my opportunity. When I started redoing Lorelei's room, I knew I didn't want to get locked into just one pink or just one pattern or texture. I wanted to have a large range of shades of pink, as well as various black and white patterns and textures. I figured this way, I didn't have to pass up on things I loved because they wouldn't match her room. It also gave me more freedom to be creative and allows her room to change as her tastes change.

Three of her walls are white, and one is pink. Most of her decor is black and white, with just a few touches of pink and silver. I made over an old rocking chair in black and white with pink tacks. I just needed a bigger splash of pink in her room. Nothing too over the top, but something that would draw the eye and be a "WOW!" piece. I also needed a pillow. Her rocking chair is very low to the ground and has arms on it, and though the arms help me get up (because I am very tall and getting up out of a rocker that is as low as this one is not an easy thing!), Lorelei does bonk her head on them pretty often, so I knew I was going to need a pillow.

 
The other inspiration for this pillow came from one of the girliest frills known to man: the rosette. A couple years ago I posted a bracelet tutorial using a rosette. I have put rosettes on bibs, dresses, headbands, bracelets, picture frames, clips... You name it. I probably hot glued a rosette to it. So I combined my love of rosettes with my love of the color pink and the neccessity for a pillow/splash of pink in Lorelei's room and this is what I got.

It was pretty time consuming and used a lot of hot glue. I am making a second pillow using another idea I have about how to make this even better and then I will post those adjustments if my plans work.


Until then, here is exactly how I created my Ombre Rosette Pillow.


I started with four shades of pink fabric and one white. I had four of the five fabrics on hand and after placing them in order from lightest to darkest I decided I needed one more very pale pink fabric to help transition the white to pink. I used a satiny fabric. You could use cotton, linen, etc. This pillow would look good with any fabric you choose.

One of my pink fabrics is actually even lining fabric, which is like $1 a yd at most craft stores. I was nervouse that the lining fabric might melt or not look as good but it blends right in and I actually prefer the way it feels over the other four fabrics. If you used all lining fabric, you could make this whole pillow for under $2 before your pillow form.

For one 16" pillow you will need:
1/4 yd of each of your three center fabrics (starting at the middle of the rosette and working out)
1/3 yd of your next fabric working out
1/2 yd of your last fabric, which you will also use for the pillow backing
16" pillow form
lots of hot glue sticks
hot glue gun
pins


First cut out a 17.5" square from your darkest fabric. If you are using a different size pillow form you will have to make adjustments accordingly. I started with a 16" pillow form so I added 1.5". I planned on using a 1/2" seam allowance so the rest of my allowance was for shrinkage from the hot glue. Turns out my guess was pretty good because it shrank about quarter of an inch all around.

 
Cut your fabric into 3" strips. You will need only one 3" strip for the very center fabric, but you can eyeball the rest as your are gluing. I cut mine selvedge to selvedge, which left me with 60" strips since my fabric was 60" selvedge to selvedge.

See your lovely pile of fabric strips? Separate them by color, to make it easier on yourself, and arrange them in order with the lightest fabric closest to you.

Lay out your square base fabric and get your hot glue gun ready.

Starting with the lightest fabric, or the fabric you want in the center of your rosette, fold the raw edges in toward the center of your strip and then fold again so that your raw edges are tucked neatly away. Put a tiny dot of hot glue here to keep it shut as you start your rosette. As we glue and work out we will keep folding the raw edges in. If you want a frayed look, you can avoid tucking the raw edges in. Satin frays horribly so I didn't want to go for that look. It would have been a mess.
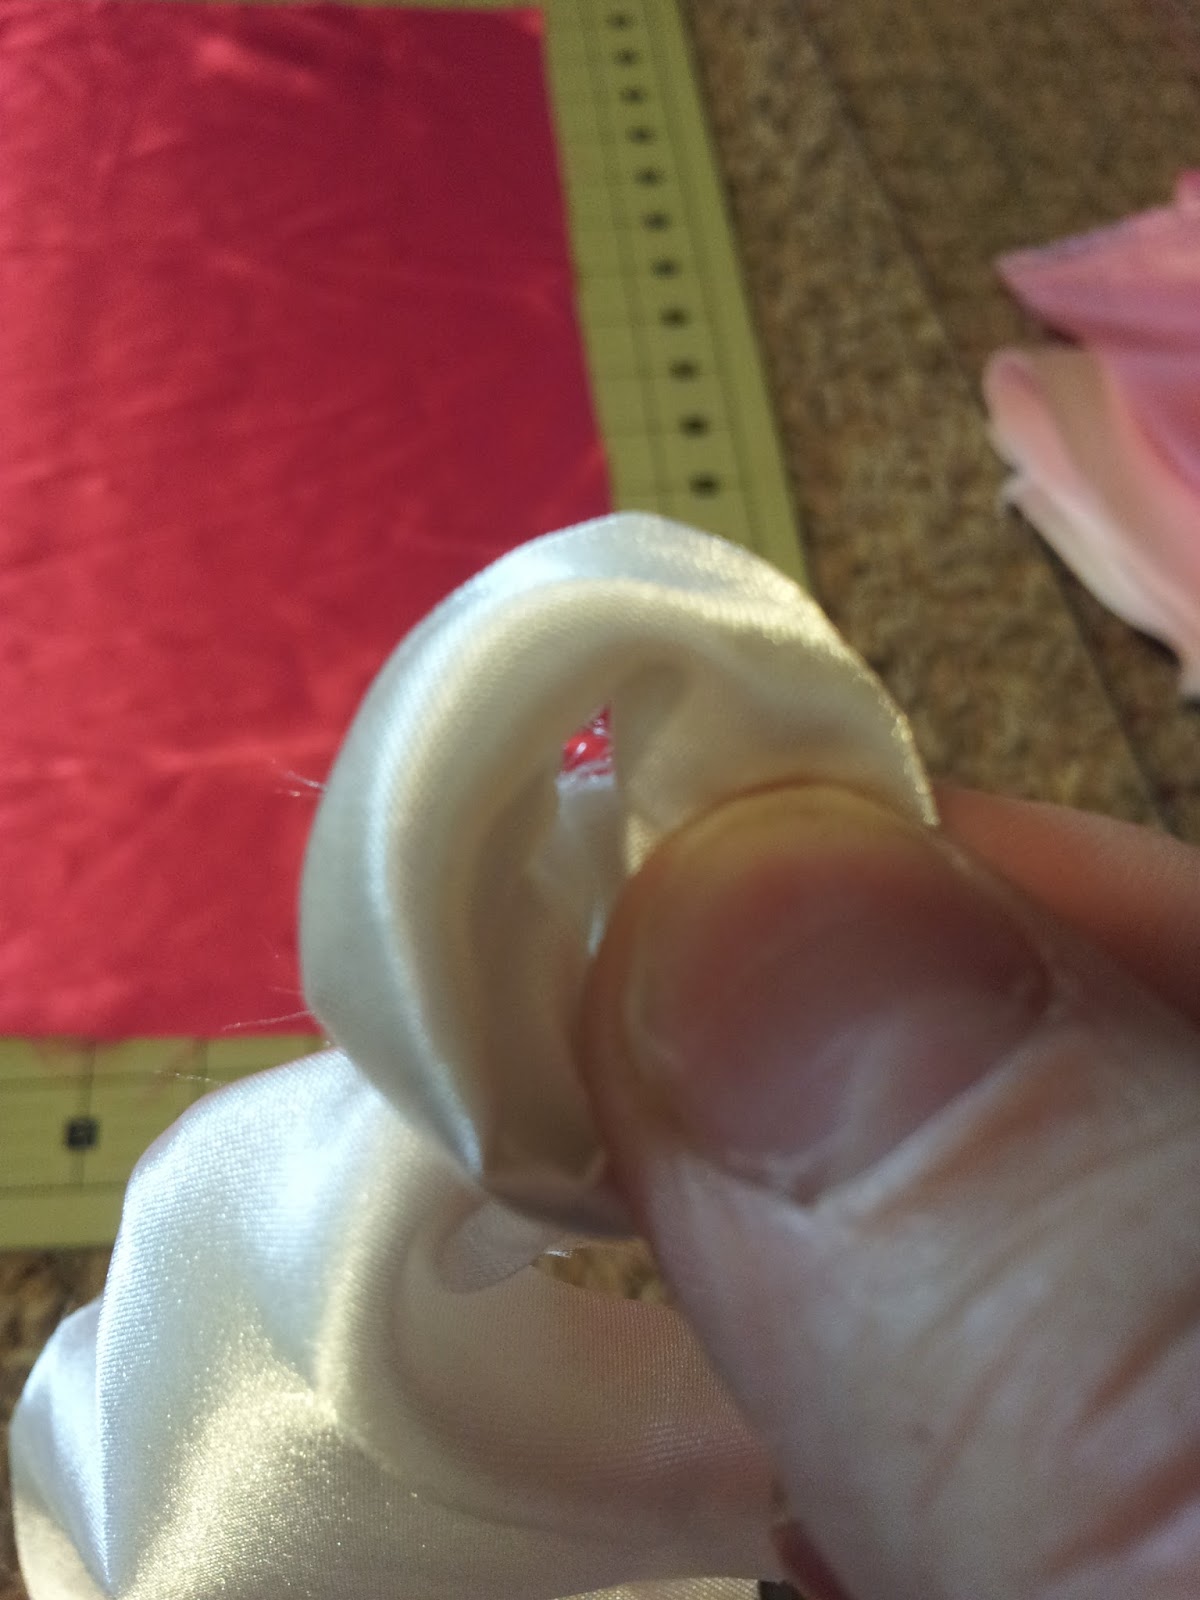
 
With the raw edges tucked and glued, loop the fabric around like you are going to make a knot.
 
 Dont pull the center through but instead leave the end of the fabric at the back of the rosette.


Put a big dob of glue wherever you want to start your rosette on your pillow and glue your little starter rosette down. Be careful not to glue the rest of the fabric strip.

 
After it is set and not sliding around, start twisting your strip and winding around the rosette you have created. I twisted out ward because I liked the way it looked best.

It is easiest to twist the fabric how you want it about 6-8" out, lay it against the already glued down portion of your rosette to make sure it looks good, then lift it up (pinching the end so it doesn't untwist), squirt a thin bead of hot glue along the path it is going to go, then flatten it on top.

Keep your rosette rows as close together as your can so your base fabric doesn't show through. If you accidentally leave gaps, you should be able to put a small dot of hot glue there and smoosh your rosette fabric on top of it.


When you get to the end of your first color, glue the ends down and then move on to your next lightest color. I folded the raw edges of my second color in and glued the end down right on top of the tail of my first fabric. This was effective for hiding the raw edges and kept the transition smooth without allowing any of my base fabric to show through. Use this technique for each color transition.

 
This is a picture of how I kept my edges tucked. I would fold them in like this, then fold the strip in half and twist.

 
When you get through a strip and want to continue one with the same color, just meet the edges and press close together and continue gluing, like I did above.
 
Keep working your way out. I chose to transition colors after each color was a couple inches thick. The picture above is at the end of my second color, right before I transitioned to my third color.

 
When you get to the edges of the fabric and can no longer go in circles, glue all the way to the edge, then fold it back in the other direction (the direction you came from) and continue twisting and gluing. Make sure you keep going in a circle and stay as close to the rosette as your can.

 
When you are finished, trim any straggly pieces hanging over the edge of your base fabric.
 
When you are all finished with the front of your pillow, it is time to make the back. We are going to make an envelope style pillowcase which will be a quick and easy way to take it off for washing.

 
Cut one rectangle that is the same length as the front of your pillow is now (it may have shrank), and 6" wide. Cut the second rectangle to be exactly the same size as your pillow front.


Pin and press both rectangles with a one inch hem on one long edge.

 
A trick I have for getting perfect 1" hems is to use my clear ruler and cutting board as a guide. I slide my ruler 2 inches down from the top edge, then fold the top edge down and pin with my pins several inches apart. Then I slide my iron inbetween the pins and once they are mostly ironed down I remove the pins and continue ironing. Then fold that edge in again and press. You will have a perfect hem.

Sew a 3/4" allowance down each hem. Press.

 
Lay your pillow front face up and arrange your pillow backs on top of it. It doesn't matter which one is in front, you can decide which one you want to be in front on the outside of the finished pillow. Lay that one face down first, then lay the other one down on top of it. Line the over lapping edges up straight and pin them to the pillow front. It looks like my top square is crooked - it is. I was more concerned that the bottom piece (which will be the outer piece when sewn and flipped) is straight. I just wanted the bigger piece to match up on the bottom edge and corners and didn't care as much about it being straight at the top where it wouldn't be seen.

Pin the rest of the edges down, taking special care that the corners match up perfectly.

Sew 1/2" all around. Making sure to backstitch at the beginning and end.

Flip inside out and Voila! Gorgeous Ombre Rosette Pillowcase!

 
Stuff your pillow form inside and admire your handiwork.

 
I absolutely do not mind if you share this idea on your blog, just give me credit! After I created this beautiful work of art I searched to see if tutorials for one like this already existed and they don't, so sharing this idea forward is fantastic, just please make sure credit gets back to the original site - here!


Saturday, July 23, 2011

Rosette Bracelet: "The Rosie" Tutorial


So when I first started this blog, it was primarily with the idea of sharing recipes. Only recently have I really branched out in to my one true love: creating...

Okay okay, my husband and kids DEFINITELY come before creating... but as far as hobbies go: making things is TOPS.

When I have been itching for something to make/do, I usually plug in my hot glue gun, grab some scraps and whatever randomness I can find laying around, and have at it.

Like this pretty little thing.

Isn't it lovely?

I have never been a big bracelet wearing gal, but lately, I have been seeing gorgeous bracelets and bangles everywhere!

So I decided to make myself a bunch.

And I will share all the juicy details with you.

Starting with today's bracelet:

The Rosie

Start with:

a plain, thick (at least 1"), bangle
a long strip of fabric, about 1" wide by 20" or so (I tore mine so it was nice and frayed)
another strip of fabric, about 1 1/2 - 2" wide by 30 inches
a hot glue gun


Make sure your bracelet is clean and doesn't have any yucky junk on it... You know, because it would be weird to walk around with a beautiful thing on your arm that had a booger hidden under the fabric or something. Not that yours would... I am just saying... I have a toddler okay...


If you want your fabric to be extra frayed, rub the edges with your fingers and pull off some of the long threads.


Then, put a dot of glue on the inside of the bangle and press the end of you fabric to it. (I had a picture of this step but it turned out way too dark because I am the genius that decided to do crafts and take pictures AT NIGHT!... Sorry!)


Start wrapping around and around the bangle, securing with glue every other wrap or so.

I chose to glue mine ONLY on the inside, in case it would create an ugly bump and ruin the integrity of my cute bracelet.


When you make it back to where you started, snip off the excess fabric, leaving about an inch past the front top of your starting point.

Then fold the tail of the piece over and glue on the inside of the bracelet, on top of your starting point so that all of the original bangle is completely covered, and your loose ends are on the inside of the bangle (the part that will touch your wrist).


Try it on... Just to admire how beautiful it is already...

Now with your other piece of fabric (I chose a gorgeous coordinating teal to make the pattern in my base fabric really pop), make a rosette. There are a million ways to make rosettes: rolled, twisted, folded, whatever.

For this one, I chose to fold my fabric in half and iron it, then fold the edges in again and lightly press. Then I made a knot at one end and started gluing and twisting, gluing and twisting.

I didn't take pictures because I only have two hands, and I would prefer to not get burnt by my glue gun while trying to take a picture and glue...

If you still need rosette making help: google it. There are a million awesome tutorials out there!


So after you finish your rosette, find an attractive place for it on your bangle and glue it right on there.


Let it dry thoroughly, and then slide on your hot new bangle and wear with EVERYTHING!


So I guess I should tell you WHY I made this bangle...

Are you ready to be amazed?

I made this bangle to match a pair of SHOES I am making.

Making, as in: yet another project I haven't yet completed.

But don't fret my pets, I will have it done and posted soon!


Isn't she a cutie? I named her "The Rosie". I love naming my jewelry. It gives me even more fuel for not being able to throw out any of my ridiculously large jewelry stash.

Have a crafty weekend!